# Vite是什么
vite---一个由vue作者尤雨溪 (opens new window)开发的web开发工具,它具有以下特点
- 快速的冷启动
- 即使的模块热更新
- 真正的按需编译
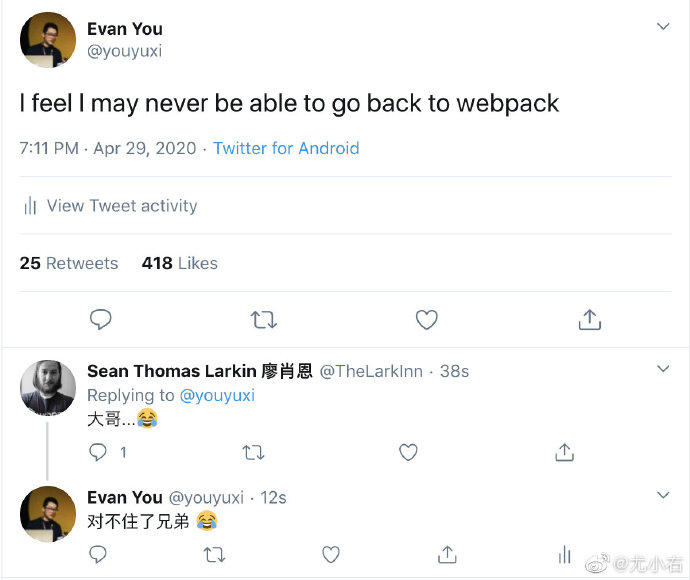
从作者在微博上的发言:
TIP
Vite, 一个基于浏览器原生 ES imports的开发服务器。利用浏览器去解析imports,在服务器端按需编译返回,完全跳过了打包这个概念,服务器随起随用。同时不仅有Vue文件支持,还搞定了热更新,而且热更新的速度不会随着模块增多而变慢。针对生产环境则可以把同一份代码用rollup打包。虽然现在还比较粗糙,但这个方向我觉得是有潜力的,做的好可以彻底解决该一行diamante等半天热更新的问题
从中可以看出vite主要特点是基于浏览器native的ES module来开发,省略打包这个步骤,因为需要什么资源直接在浏览器里引入既可
基于浏览器ES module来开发web应用也不是什么新鲜事,snowpack也基于此,不过目前此项目社区中并没有流行起来,vite的出现也会会让这种开发方式在火一阵子
有趣的是 vite 算是革了 webpack 的命了(生产环境用 rollup),所以 webpack 的开发者直接喊大哥了...
作者注:文本完成于vite早起时,vite部分功能和原理有更新
# vite的使用方式
同常见的开发工具一样,vite提供了用npm或者yarn一键生产项目结构的方法,使用yarn在终端执行
$ yarn create vite-app <project-name>
$ cd <project-name>
$ yarn
$ yarn dev
既可初始化一个vite项目(默认应用模板为vue3.x),生产的项目结构十分简洁
|____node_modules
|____App.vue // 应用入口
|____index.html // 页面入口
|____vite.config.js // 配置文件
|____package.json
执行 yarn dev 既可启动应用
# vite启动链路
# 命令解析
这部分代码在src/node/cli.ts里,主要是借助minimist-- 一个轻量级的命令解析工具解析 npm scripts,解析的函数是resolveOptions,精简后的代码片段如下
function resolveOptions() {
    // command 可以是 dev/build/optimize
    if(argv._[0]) {
        argv.command = argv._[0];
    }
    return argv;
}
拿到options后,会根据options.command 的值判断是执行在开发环境需要的runServe命令或生产环境需要的runBuild命令
if(!options.command || options.command === 'serve') {
    runServer(options);
} else if(options.command === 'build') {
    runBuild(options);
} else if(options.command === 'optimize') {
    runOptimize(options)
}
在runServe方法中,执行server模块创建开发服务器方法,同样在runBuild中执行build模块的构建方法。
最新版本中还增加了optimize命令的支持,关于optimize做了什么 我们下文再说
# server
这部分代码在src/node/server/index.ts里,主要暴露一个 createServer方法。
vite使用koa作为web server,使用clmloader创建了一个监听文件改动的watcher,同时实现了一个插件机制,将koa-app和watcher以及其他必要工具组合成一个context对象注入到每个plugin中。
context组成如下

plugin依次从context里获取上面这些组成部分,有的plugin在koaa实例添加了几个middleware,有的借助watcher实现对文件的改动监听,这种插件机制带来的好处是整个应用结构清晰,同时每个插件处理不同的事情,职责更分明
# plugin
上文我们说到plugin,有哪些plugin呢?他们分别是:
- 用户注入的plugins--自定义plugins
- hmrPlugin--处理hmr
- htmlRewritePlugin--重写html内的scrip内容
- moduleResolvePlugin ——获取模块内容
- vuePlugin —— 处理 vue 单文件组件
- esbuildPlugin —— 使用 esbuild 处理资源
- assetPathPlugin —— 处理静态资源
- serveStaticPlugin —— 托管静态资源
- cssPlugin —— 处理 css/less/sass 等引用
- ...
我们来看plugin的实现方式,开发一个用来拦截json文件plugin可以这么实现
interface ServerPluginContext {
    root: string
    app: Koa
    server: Server
    watcher: HMRWatcher
    resolver: InternalResolver
    config: ServerConfig
}

type ServerPlugin = (ctx: ServerPluginContext) => void

const JsonInterceptPlugin:ServerPlugin = ({app})=>{
  	app.use(async (ctx, next) => {
      await next()
      if (ctx.path.endsWith('.json') && ctx.body) {
        ctx.type = 'js'
        ctx.body = `export default json`
      }
  })
}
vite 背后的原理都在 plugin 里,这里不再一一解释每个 plugin 的作用,会放在下文背后的原理中一并讨论。
# build
这部分代码在node/build/index.ts中,build目录的机构虽然与server相似,同样导出了一个build方法,同样也有许多plugin,不过这些pulugin与server中的用途不一样,因为build使用了rollup,虽然这些plugin也是为了rollup打包的plugin,本文不在多提
# viet运行原理
# ES module
要了解vite的运行原理,首先要知道什么是ES module,目前主流浏览器对其的支持如下

主流的浏览器(IE11除外)均已经支持, 其最大的特点是在浏览器端使用export import的方式导入和导出模块,在script标签里设置type="module",然后使用模块内容
<script type="module">
    import { bar } from './bar.js'
</script>
当html里嵌入上面的script标签的时候,浏览器会发起http请求,请求http server托管的bar.js,在bar.js里,我们用named export导出bar变量,在上面的script中能获取到bar的定义
// bar.js
export const bar = 'bar';
# ES module 在vite中的作用
打开运行中的vite项目,访问vite-source可以发现html里有段这样的代码
<script type="module">
    import { createApp } from '/@modules/vue';
    import App from '/App.vue';
    createApp(App).mount('#app')
</script>
从这段代码中,我们能get到以下几点信息
- 从 http://localhost:3000/@modules/vue 中获取 createApp 这个方法
- 从 http://localhost:3000/App.vue 中获取应用入口
- 使用 createApp 创建应用并挂载节点
createApp 是vue3.x的api,只需知道这是创建了vue应用既可,vite利用 ES Module,把 “构建vue应用” 这个本来需要webpack打包后才能执行的代码直接放在浏览器里执行了,这么做是为了
- 去掉打包步骤
- 实现按需加载
去掉打包步骤
打包的概念是开发者利用打包工具将应用各个模块集合在一起形式 bundle,但打包的过程是静态的---不管某个模块的代码是否执行到,这个模块都要打包到bundle,这样的坏处就是随着项目越来越大打包后的bundle也就越来越大
实现按需打包
前面说到,webpack 之类的打包工具会将各模块提前打包进 bundle 里,但打包的过程是静态的——不管某个模块的代码是否执行到,这个模块都要打包到 bundle 里,这样的坏处就是随着项目越来越大打包后的 bundle 也越来越大。
开发者为了减少 bundle 大小,会使用动态引入 import() 的方式异步的加载模块( 被引入模块依然需要提前打包),又或者使用 tree shaking 等方式尽力的去掉未引用的模块,然而这些方式都不如 vite 的优雅,vite 可以只在需要某个模块的时候动态(借助 import() )的引入它,而不需要提前打包,虽然只能用在开发环境,不过这就够了
# Vite如何处理ESM
既然vite使用ESM在浏览器里使用模块,那么这一步究竟是周末做的?
上文提到过,在浏览器里使用ES module是使用http请求拿到模块,所以vite必须提供一个web server去代理这些模块,上文中提到的koa就是负责这个事情,vite通过对请求路径的劫持获取资源的内容返回给浏览器,不过vite对于模块导入做了特殊处理。
@modules 是什么?
通过工程下的index.html和开发环境下的html源文件对比,发现script标签里的内容发生了变化,由
<script type="module">
    import { createApp } from 'vue';
    import App from '/App.vue';
    createApp(App).mount('#app')
</script>
变成了
<script type="module">
    import { createApp } from '/@modules/vue';
    import App from '/App.vue';
    createApp(App).mount('#app')
</script>
vite对import 都做了一层处理,其过程如下
- 在koa中间件里获取请求body
- 通过es-module-lexer解析资源ast拿到import的内容
- 判断import的资源是否是绝对路径,绝对视为npm模块
- 返回处理后的资源路径:"vue" -> "/@modules/vue" 这部分代码在serverPluginModuleRewrite这个plugin中
为什么需要@module
如果我们在模块里写下以下代码的时候,浏览器的esm是不可能获取到导入的模块内容的
import vue from 'vue';因为vue这个模块安装在node_modules里,以往使用webpack,webpack遇到上面的代码,会帮我做以下几件事
- 获取这段代码的内容
- 解析成AST
- 遍历AST拿到 import 语句中的包的名称
- 使用enhanced-resolve拿到包的实际地址进行打包
但是浏览器中ESM无法直接访问项目下的node_modules,所以vite对所有import都做了处理,用带有 @modules 的前缀重写它们。
从另外一个绝对看这是非常巧妙的做法,把文件路径的rewrite都写在同一个plugin里,这样后续如果加入更多逻辑,改动起来不会影响其他plugin,其他plugin拿到资源路径都是 @modules,比如说后续可能加入 alias 的配置,就像webpack alias一样:可以将项目里的本地文件配置成绝对路径的引用
怎么返回模块内容
在下一个koa middleware中,用正则匹配到路径上带有@modules的资源,在通过require('xxxx')拿到包的导出返回给浏览器。
以往使用webpack之类的打包工具,它们除了将模块组装到一起形成bundle,还可以让使用了不同模块规范的包互相引用,比如
TIP
- ES module(esm)导入cjs
- CommonJS(cjs)导入esm
- dynamic import 导入esm
- dynamic import 导入cjs
关于es module的坑可以看这篇文章 (opens new window)
起初在vite还只是为了vue3.x设计的时候,对vue esm包是经过特殊处理的,比如:需要@vue/runtime-dom这个包的内容,不能直接通过
require('@vue/runtime-dom')得到,而需要通过
require('@vue/runtime-dom/dist/runtime-dom.esm-bundler.js')的方式,这样可以使得vite拿到符合esm模块标准的vue包。
目前社区中大部分模块都没有设置默认导出esm,而是导出了cjs的包,既然vue3.0需要额外处理才能拿到esm的包内容,那么其他日常使用的npm是不是也同样需要支持?答案是肯定的,目前在vite项目里直接使用lodash还是会报错的

不过vite在最近的更新中,加入了optimize命令,这个命令专门为解决模块引用的坑而开发,例如我们要在vite中使用lodash,只需要在vite.config.js(vite配置文件),配置 optimizeDeps 对象,在include 数组中添加lodash
// vite.config.js
module.exports = {
    optimizeDeps: [
        include: ['lodash']
    ]
}
这样vite在执行 runOptimize 的时候中会使用rollup对lodash包重新编译,将编译撑符合esm模块规范的新的包放入node_module下的.vite_opt_cache,然后配合resolver对lodash的导入进行处理:使用编译后的包内容代替原来lodash的包内容,这样就解决了vite中不能使用cjs包的问题,这部分代码在 depOptimizer.ts 里。
不过这里还有个问题,由于 depOptimizer.ts 中,vite只会处理在项目下package.json里的 dependencies 里声明好的包进行处理,所以无法在项目里使用
import pick from 'lodash/pick';的方式使用pick方法 ,而要使用
import lodash from 'lodash';
lodash.pick();
的方式,这可能在生产环境下使用某些包的时候对bundle的体积有影响
返回模块的内容的代码在: serverPluginModuleResolve.ts 这个plugin中
# vite如何编译模块
最初 vite 为 vue3.x 开发,所以这里的编译指的是编译 vue 单文件组件,其他 es 模块可以直接导入内容。
SFC
vue单文件组件(简称SFC)是vue的一个亮点,前端界对SFC褒贬不一,个人看来,SFC是利大于弊,虽然SFC带来了额外的开发工作量,比如为了解析template要写模板解析器,还要在SFC中解析出逻辑和样式,在vscode里要写vscode插件,在webpack里要写vue-loader,单独UI与适用方来说可以在一个文件里同时写template、js、style,省去了个文件互相跳转。
与vue-loader相似,vite在解析vue文件的时候也要分别处理多次,我们打开浏览器的network,可以看到

1个请求的query中山门都没有,另2个请求分别通过query里指定了type为style 和template。
先来看看如何将一个SFC变成多个请求,我们从第一次请求开始分析,简化后的代码如下
function vuePlugin({app}) {
    app.use(async (ctx, next) => {
        if(!ctx.path.endsWith('.vue') && !ctx.vue) {
            return next();
        }

        const query = ctx.query;
        // 获取文件名称
        let filetname = resolver.erquestToFile(publicPath);

        // 解析器解析SFC
        const descriptor = await parseSFC(root, filename, ctx.body);
        if(!descriptor) {
            ctx.status = 404;
            return;
        }
        // 第一次请求.vue
        if(!query.type) {
            if (descriptor.script && descriptor.script.src) {
                filename = await resolveSrcImport(descriptor.script, ctx, resolver)
            }
            ctx.type = 'js'
            // body 返回解析后的代码
            ctx.body = await compileSFCMain(descriptor, filename, publicPath)
        }
        // ...
    })
}
在 compileSFCMain 中是一段长长的 generate 代码:
function compileSFCMain(descriptor, filePath: string, publicPath: string) {
    let code = ''
    if (descriptor.script) {
        let content = descriptor.script.content
        code += content.replace(`export default`, 'const __script =')
    } else {
        code += `const __script = {}`
    }

    if (descriptor.styles) {
        code += `\nimport { updateStyle } from "${hmrClientId}"\n`
        descriptor.styles.forEach((s, i) => {
        const styleRequest = publicPath + `?type=style&index=${i}`
        code += `\nupdateStyle("${id}-${i}", ${JSON.stringify(styleRequest)})`
        })
        if (hasScoped) {
        code += `\n__script.__scopeId = "data-v-${id}"`
        }
    }

    if (descriptor.template) {
        code += `\nimport { render as __render } from ${JSON.stringify(
        publicPath + `?type=template`
        )}`
        code += `\n__script.render = __render`
    }
    code += `\n__script.__hmrId = ${JSON.stringify(publicPath)}`
    code += `\n__script.__file = ${JSON.stringify(filePath)}`
    code += `\nexport default __script`
    return code
}
直接看 generate 后的代码:
import { updateStyle } from "/vite/hmr"
updateStyle("c44b8200-0", "/App.vue?type=style&index=0")
__script.__scopeId = "data-v-c44b8200"
import { render as __render } from "/App.vue?type=template"
__script.render = __render
__script.__hmrId = "/App.vue"
__script.__file = "/Users/muou/work/playground/vite-app/App.vue"
export default __script
出现了 vite/hmr 的导入,vite/hmr 具体内容我们下文再分析,从这段代码中可以看到,对于 style vite 使用 updateStyle 这个方法处理,updateStyle 内容非常简单,这里就不贴代码了,就做了 1 件事:通过创建 style 元素,设置了它的 innerHtml 为 css 内容。
这两种方式都会使得浏览器发起 http 请求,这样就能被 koa 中间件捕获到了,所以就形成了上文我们看到的:对一个 .vue 文件处理三次的情景。
这部分代码在:serverPluginVue 这个 plugin 里。
css
如果在 vite 项目里引入一个 sass 文件会怎么样?
最初 vite 只是为 vue 项目开发,所以并没有对 css 预编译的支持,不过随着后续的几次大更新,在 vite 项目里使用 sass/less 等也可以跟使用 webpack 的时候一样优雅了,只需要安装对应的 css 预处理器即可。
在 cssPlugin 中,通过正则:/(.+).(less|sass|scss|styl|stylus)$/ 判断路径是否需要 css 预编译,如果命中正则,就借助 cssUtils 里的方法借助 postcss 对要导入的 css 文件编译。
# vite热更新的实现
上文中出现了 vite/hmr ,这就是 vite 处理热更新的关键,在 serverPluginHmr plugin 中,对于 path 等于 vite/hmr 做了一次判断:
app.use(async (ctx, next) => {
    if(ctx.path === '/vite/hmr') {
        ctx.type = 'js';
        ctx.status = 200;
        ctx.body = hmrClient;
    }
})
hmrClient是vite热更新的客户端代码,需要在浏览器里执行,这里先来说说通用的热更新实现,热更新一般需要四个部分:
- 首先需要web框架支持的rerender/reload
- 通过watcher监听文件改动
- 通过server端编译资源,并推送新模块内容给client
- client收到新的模块内容,执行rerender/loader
vite 也不例外同样有这四个部分,其中客户端代码在:client.ts 里,服务端代码在 serverPluginHmr 里,对于 vue 组件的更新,通过 vue3.x 中的 HMRRuntime 处理的。
client 端
在 client 端, WebSocket 监听了一些更新的类型,然后分别处理,它们是:
- vue-reload —— vue 组件更新:通过 import 导入新的 vue 组件,然后执行 HMRRuntime.reload
- vue-rerender —— vue template 更新:通过 import 导入新的 template ,然后执行 HMRRuntime.rerender
- vue-style-update —— vue style 更新:直接插入新的 stylesheet
- style-update —— css 更新:document 插入新的 stylesheet
- style-remove —— css 移除:document 删除 stylesheet
- js-update —— js 更新:直接执行
- full-reload —— 页面 roload:使用 window.reload 刷新页面
server 端
在 server 端,通过 watcher 监听页面改动,根据文件类型判断是 js Reload 还是 Vue Reload:
 watcher.on('change', async (file) => {
const timestamp = Date.now()
   if (file.endsWith('.vue')) {
   handleVueReload(file, timestamp)
   } else if (
   file.endsWith('.module.css') ||
   !(file.endsWith('.css') || cssTransforms.some((t) => t.test(file, {})))
   ) {
   // everything except plain .css are considered HMR dependencies.
   // plain css has its own HMR logic in ./serverPluginCss.ts.
   handleJSReload(file, timestamp)
   }
})
在 handleVueReload 方法里,会使用解析器拿到当前文件的 template/script/style ,并且与缓存里的上一次解析的结果进行比较,如果 template 发生改变就执行 vue-rerender,如果 style 发生改变就执行 vue-style-update,简化后的逻辑如下:
 async function handleVueReload(
   file
   timestamp,
   content
) {
   // 获取缓存
   const cacheEntry = vueCache.get(file)

   // 解析 vue 文件
   const descriptor = await parseSFC(root, file, content)
   if (!descriptor) {
   // read failed
   return
   }
       // 拿到上一次解析结果
   const prevDescriptor = cacheEntry && cacheEntry.descriptor

   // 设置刷新变量
   let needReload = false // script 改变标记
   let needCssModuleReload = false // css 改变标记
   let needRerender = false // template 改变标记

   // 判断 script 是否相同
   if (!isEqual(descriptor.script, prevDescriptor.script)) {
   needReload = true
   }

   // 判断 template 是否相同
   if (!isEqual(descriptor.template, prevDescriptor.template)) {
   needRerender = true
   }

   // 通过 send 发送 socket
   if (needRerender){
       send({
       type: 'vue-rerender',
       path: publicPath,
       timestamp
   })
   }
}
handleJSReload 方法则是根据文件路径引用,判断被哪个 vue 组件所依赖,如果未找到 vue 组件依赖,则判断页面需要刷新,否则走组件更新逻辑,这里就不贴代码了。
整体代码在 client.ts 和 serverPluginHmr.ts 里。